Solution Download
SecureAccessInformationCenter.zip (8.3 KB)
Summary
This is a companion post to Securing the Web Console Made Easy.
The Netwrix Access Information Center (AIC) web interface is not initially configured to use HTTPS, or a new certificate needs to be applied, requiring several manual steps to enable secure communication.
Problem
Even when the AIC is only accessed within an internal corporate network, enabling HTTPS is a standard security requirement.
As with Securing the Web Console to leverage SSL, a common challenge with the AIC is configuring its web interface to use SSL/TLS for encrypted communication.
When we initially Install the Access Information Center in version 12.0 and later we do have the option to configure SSL/TLS, however we do not have this as an option in older versions which require manual configuration. Additionally, when the time comes to update the certificate in version 12.0 this would require an uninstall/reinstall of the AIC.
Solution
The Secure Access Information Center job mirrors the automation I created for the Published Reports Web Console, Securing the Web Console Made Easy.
It performs all required steps in one pass:
- Updates the AIC’s AccessInformationCenter.Service.exe.Config file with the new HTTPS port.
- Binds the supplied certificate thumbprint to that port.
- Configures the Netwrix Access Information Center service to run as a specified service account with the credentials passed via a connection profile.
- Creates or refreshes the URL ACL so the service account can reserve the endpoint.
- Restarts the AIC web service so the changes take effect immediately.
Run the job whenever a fresh certificate is issued and the entire SSL lifecycle is handled without much manual intervention.
Instructions
-
Certificate
Import the certificate you received from your CA into the Local Machine store.
Launch the Certificate Import Wizard and choose “Automatically select the certificate store …” so Windows places it in the Local Computer store.
Open certmgr.msc, double-click the certificate, switch to the Details tab and copy the thumbprint—you’ll need it in a moment.
-
Service Account
The AIC service account must be granted “Log on as a service” in the Local Security Policy (secpol.msc → User Rights Assignment).
If the AIC connects to SQL with Windows authentication, also verify the account has the required Database Permissions to access the database. -
Connection Profile
If you don’t already have a profile created for the service account, you’ll need to Create a Connection Profile.
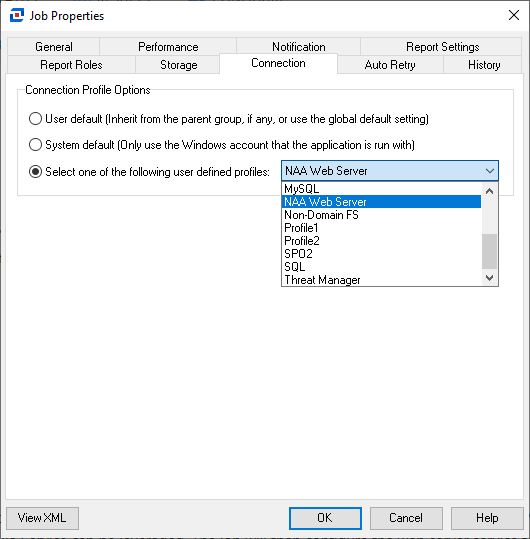
After a connection profile is created, you’ll need to assign it to the job. Right-click the SecureAccessInformationCenter job → Properties → Connection tab, choose “Select one of the following user-defined profiles”, pick the profile from the drop-down and click OK.
-
Configuration
The job exposes two parameter settings:


- Certificate thumbprint to bind – paste the thumbprint you copied earlier.
- Port to bind certificate – defaults to 481; adjust if your environment uses a different port.

- Run
Hit Run Now (or right-click → Run Job).
When the certificate expires, import the replacement, update the thumbprint in the job parameters, and run it again—no further manual steps required.
