Solution Download
SecurePublishedReports.zip (9.1 KB)
Summary
The Netwrix Access Analyzer (NAA) Published Reports site is not initially configured to use HTTPS, requiring multiple manual steps to enable secure communication.
Problem
Over the years working with Netwrix Access Analyzer (NAA), one recurring challenge has been the configuration of the Published Reports web portal to utilize SSL (Secure Sockets Layer) for encrypted, secure communication. While SSL is a standard requirement for any web-based interface, even those that are only accessed over internal corporate networks, getting it implemented correctly within the NAA ecosystem is often time-consuming, unintuitive, and prone to misconfiguration.
The process typically involves multiple steps:
- Manual modification of the “WebServer.exe.Config” file to configure HTTPS and the desired port.
- Manually binding the certificate thumbprint to the configured port, either through Windows Command Prompt or PowerShell.
- Manually configuring the URL ACL (Access Control List) in Windows to define access permissions for HTTP and HTTPS URLs that are registered with the HTTP server APIs, again either through Windows Command Prompt or PowerShell.
- Restarting the web server service for those changes to take effect.
For reference, here’s a link to the documentation that provides the steps to enable SSL:
Securing the Web Console
What’s more, SSL certificates have an expiration date, meaning that we’re going to have to go through removing and binding a new certificate when that time inevitably arrives.
I spent several years working as a Support Engineer before becoming a Systems Engineer, and I can attest to the frequency of customers opening support tickets because their SSL certificate had expired, costing them time they could have likely focused elsewhere.
Solution
The Secure Published Reports job will automate the majority of this burden, allowing you to complete the initial configuration, or just apply a new certificate, in a much shorter time span and with a lot less effort. Just imagine the time saved not having to open a support ticket and schedule a meeting to apply a new or updated certificate!
Instructions
-
Certificate
After acquiring the certificate from your Certificate Authority, the certificate should be stored in the Local Machine Store.
On the next screen, go ahead and select the option to “Automatically select the certificate store based on the type of certificate”, this will save the certificate to the Local Computer Certificate Store.
It’s a good idea at this point to open the Certificate Manager Console (certmgr.msc) to acquire the certificate thumbprint. Simply double-click on the certificate and then click the “Details” tab.
-
Service Account
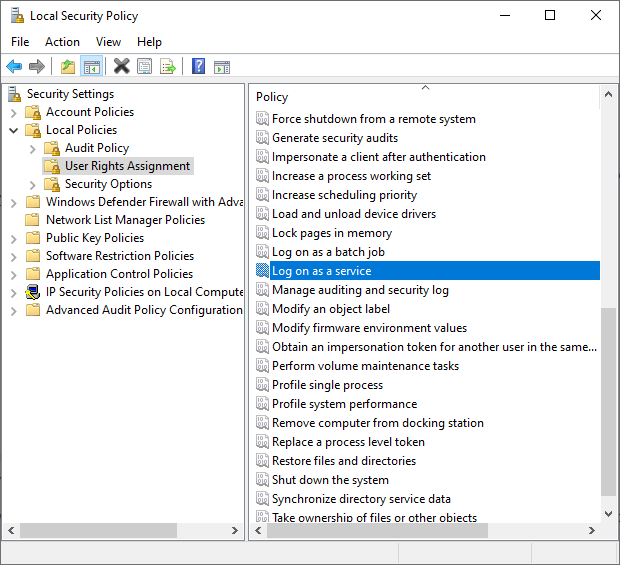
The service account will need to be granted “Logon as a service” rights in the Local Security Policy (secpol.msc).
Additionally, if NAA is configured to leverage Windows Authentication to the SQL database, we’ll need to ensure the service account has the appropriate Database Permissions to access the database. -
Connection Profile
Next, if we’re not using an existing Connection Profile, we’ll need to create a new Connection Profile for the service account.
After the Connection Profile is created, we’ll need to assign it to the job. To perform this, right-click on the SecurePublishedReports job, then click “Properties”. From here, you’ll want to go to the “Connection” tab, tick the radio button for “Select one of the following user-defined profiles:”, and finally select the desired Connection Profile from the drop-down menu, then click OK to save the setting.
-
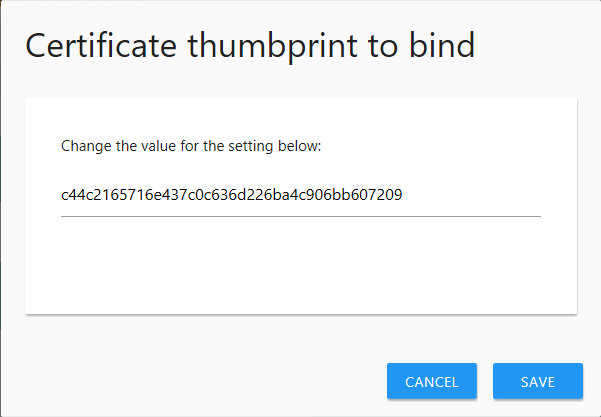
Now that we have our certificate thumbprint and our service account and connection profile configured, we can get to the fun part. You’ll find two configuration parameters for this job, a “Certificate thumbprint to bind” and a “Port to bind certificate”.
Clicking on the pencil will allow you to configure each option.
Once configured as desired, we can click the Run Now button, or right-click on the job and click Run Job.
That’s it! When your certificate nears expiration, you’ll be able to simply install the new certificate, get the thumbprint, and run this job to update it.


